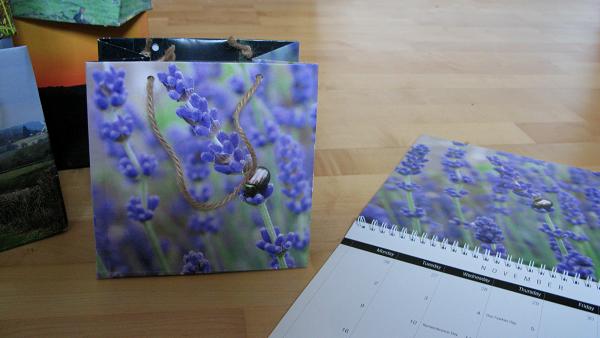
Making Gift Bags from Old Calendars
Follow these simple steps to create beautiful Gift Bags
Step 1: You’ll need an old calendar, twine/ribbon, scissors, single-hole punch & sellatape or glue stick
Step 2: Choose two pictures. Trim the raw edge where it was attached to the center
Step 3: Stack pictures on top of each other
Step 4: Flip the pictures over and fold down the top about 1/2"
Step 5: Fold pictures along the left or right side (depending on what part of the picture you like the least) about 1/3 of the calendar page. This fold creates the side of the bag.
Step 6: Fold the flap you just made in half
Step 7: Fold the other side of the pages about a 1/2"
Step 8: Fold the bottoms up about 1"-1 1/2"
Step 9: Separate the pages
Step 10: Place glue or sellatape on the small flap of one side
Step 11: Tuck the small flap into the side the larger flap on the other page. Make sure to tuck the flap in all the way to make the side of the bag.
Step 12: Repeat with the other side
Step 13: Make 4 cuts at the bottom corners up to the folds you previously made
Step 14: Glue all the folds down to create the bottom
Step 15: Flip the bag over and press down to secure the bottom
Step 16: Finish off with card to fit inside the bottom of the bag and punch two holes on each side of the bag and cut two pieces of ribbon or twine the same size for the handles, knotted inside the bag to secure.
(http://idohaveatalent.wordpress.com/2011/08/17/upcycle-calendar-to-gift-bag/)


